However, time spent out on the slopes or doing other activities can lead to sore and tired muscles. Practice these eight yoga poses before and after your winter sports sessions to prevent soreness, improve your flexibility, strengthen your muscles and increase your ability to focus.
Warrior I
1 of 9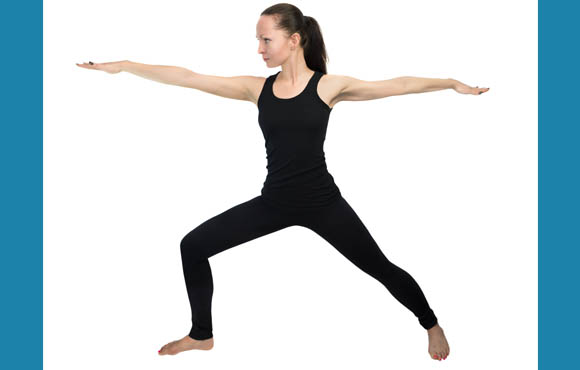
How to do it: Step your feet widely apart with your right foot at a 90-degree angle and your left foot at a 45-degree angle. Align your front heel with the arch of your back foot. Keep your pelvis turned toward the front of your mat. Press your weight through your left heel. Then, bend your right knee over your right ankle. Your shin should be perpendicular to the floor. Reach up strongly through your arms. Broaden across your belly, lengthen the sides of your waist and lift through your chest. You can keep your arms parallel or press your palms together
Why it's good: Builds strength in your ankles, knee and hips joints and improves balance.
Crescent Lunge
2 of 9
How to do it: Start on your hands and knees. Step your right foot between your hands into a lunge, keeping your right knee directly above your heel. Slowly lift your back knee off the floor. Press your back heel toward the wall behind you as you begin to straighten the back leg. Keep your spine long as you hold and breathe.
Why it's good: Strengthens the quadriceps and glutes. Stretches the psoas and hips. Targets all areas that winter sports use constantly.
Downward Facing Dog
3 of 9
How to do it: Come to the floor on your hands and knees. Push with your hands and straighten your legs till you are in the shape of an inverted 'V'. Extend your pelvic bones up and heels down. Let your head hang freely and stretch your waist. Heels should be off the floor, but actively trying to reach the floor.
Why it's good: Elongates the shoulders. Stretches and strengthens the hands, wrists, low back, hamstrings, calves, foot arches and Achilles tendon, which are all essential for any sport.
Chair Pose
4 of 9
How to do it: Stand with your feet together, with your big toes touching. Raise your arms above your head, perpendicular to the floor, and bring your thighs parallel to the floor as if you are sitting in a chair.
Why it's good: Strengthens the ankles, thighs, calves and spine while stretching the shoulders and chest. A great pose for the tucked position in skiing.
Bridge
5 of 9
How to do it: Lie on your back, bend your knees and place your feet flat on the floor hip-width apart. You should be able to touch the backs of your heels with your hands. Place your arms on the floor alongside your body, palms down and as you inhale, lift your hips off the floor and press them to the ceiling. Keep your knees directly over your heels. Hold.
Why it's good: Strengthens the back and develops the muscles that surround the spine. A powerful move for building the glutes, hips and hamstrings which are essential for skating, skiing, snowboarding and snowshoeing.
Reclining Big Toe Pose
6 of 9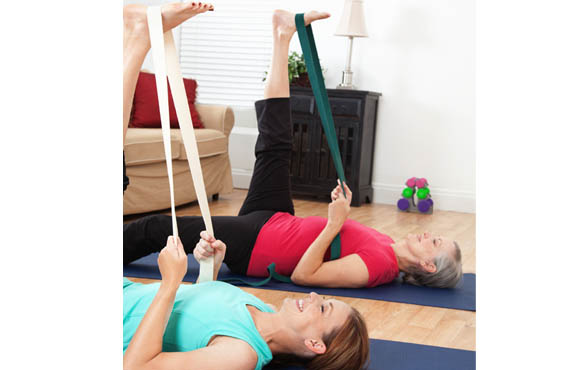
How to do it: Lie on your back and extend your left leg toward the ceiling at a 90-degree angle with your right leg extended along the floor. Flex both feet. Bend your left knee and bring the knee in toward your chest using your hands. Hug it tightly against your body to relax your hip. Next, loop a strap around your left foot and slowly straighten the left leg back to 90 degrees. Press your right thigh firmly down against the floor.
Why it's good: Stretches the hips, thighs, hamstrings, groin and calves and strengthens the knees. Good for all sports that involve using the major leg muscles.
Toes Pose
7 of 9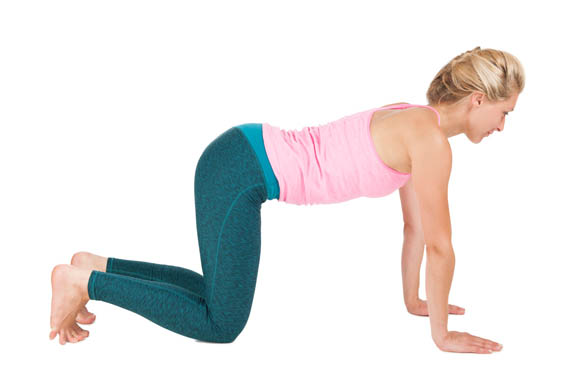
How to do it: Kneel on the floor and sit back on your heels. Tuck your toes under and try to be on the balls of your feet, not your toes. Reach behind you and tuck the little toes under. Hold this pose for 30 to 60 seconds. To alleviate some of the tension, you may walk your hands out in front of you so all of your weight is not on your feet.
Why it's good: Stretches out all 10 toes and the fascia in your feet, which is necessary after stuffing your feet in ski boots all day and dealing with cramped feet and ankles.
Plank Pose
8 of 9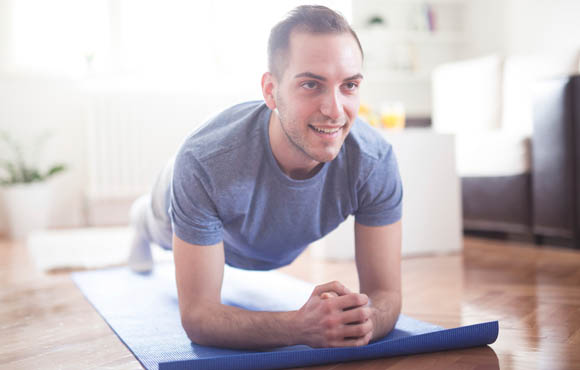
How to do it: Start by getting into a push-up position. Bend your elbows and rest your weight on your forearms—not on your hands. Your body should form a straight line from shoulders to ankles. Engage your core by sucking your belly button into your spine. Hold this position for 20 to 60 seconds.
Why it's good: Strengthens the entire core, which includes abdominals, hips and low back—essentials for all winter sports.

Discuss This Article